Welcome to the magical realm of pumpkin carving, a place where your creativity can truly soar without limitations. In the following comprehensive guide, we will embark on a journey to uncover the 10 Best Pumpkin Carving Techniques specifically tailored for beginners, opening doors to a vast expanse of artistic possibilities.
In this enchanting pursuit, we’ll delve into the intricacies of pumpkin artistry, providing you with the knowledge and skills needed to transform a simple pumpkin into a canvas of endless imagination. Whether you’re a novice or have some carving experience, this guide is designed to cater to beginners, ensuring a smooth and enjoyable introduction to the captivating world of pumpkin carving.
Together, we’ll unlock the secrets behind each technique, demystifying the art of carving to empower you with the confidence to create stunning pumpkin masterpieces. Get ready to explore and embrace the boundless potential that lies within the humble pumpkin as we embark on this artistic adventure together.
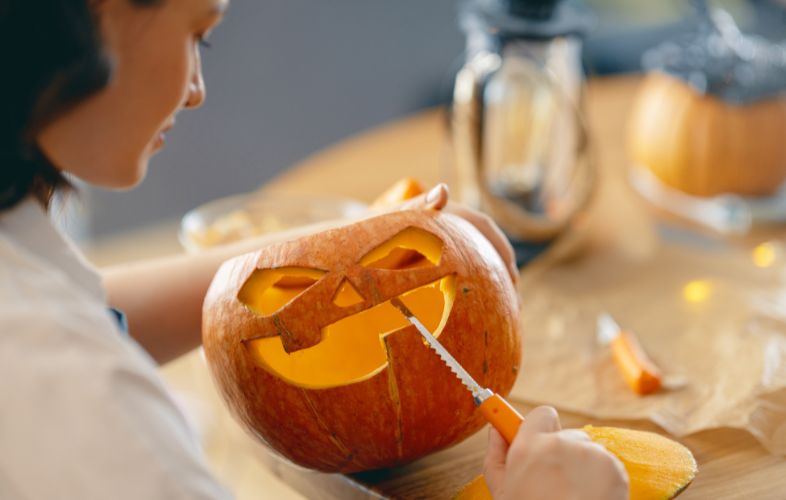
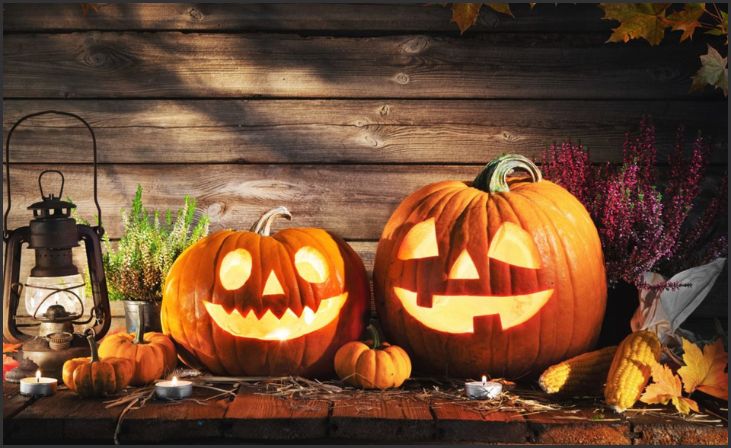
Classic Jack-o’-Lantern Face:
The classic Jack-o’-lantern face is a timeless choice for beginners. To create this design, start by selecting a medium-sized pumpkin. Cut a hole in the top to remove the seeds and pulp, then scrape the inside walls to create a smooth surface. Draw a face with triangular eyes, a small nose, and a smiling mouth on the pumpkin’s exterior. Use a sharp knife to carefully carve along the drawn lines, creating openings for the light to shine through. Illuminate your creation with a candle or LED light for the traditional spooky effect. This simple yet iconic design is perfect for those just starting with pumpkin carving, providing a foundation for more intricate designs.
Also Read:- PUMPKIN GROWING TIPS
Stencil Carving:
Stencil carving allows beginners to achieve professional-looking designs with ease. Begin by selecting a stencil that matches your desired pattern—a variety of free and purchasable stencils are available online. Tape the stencil securely onto the pumpkin’s surface. Trace the stencil onto the pumpkin using a pen or a poking tool to create a dotted outline. Once the outline is complete, use a carving knife to cut along the traced lines, carefully removing the excess pumpkin. Peel off the stencil, and you’ll reveal a beautifully carved design. This technique is a fantastic way to create intricate and detailed pumpkins without the need for advanced carving skills.
Silhouette Pumpkins:
Silhouette pumpkins offer a stylish and straightforward approach to pumpkin carving. Choose a design that works well in silhouette, such as a cat, bat, or ghost. Begin by selecting a medium to large-sized pumpkin. Tape a printed silhouette design onto the pumpkin’s surface, ensuring it stays securely in place. Carefully trace the outline of the design onto the pumpkin using a pen or poking tool. Once the outline is complete, use a sharp knife to carefully carve around the traced lines, removing the excess pumpkin and revealing the silhouette. This technique creates a bold and visually striking effect when the pumpkin is illuminated from within. Silhouette pumpkins are a great choice for those who want a sophisticated and modern twist on traditional carving.
Drill Holes for a Glowing Effect:
Achieve a mesmerizing glowing effect by using a drill to create patterns of holes in your pumpkin. This technique provides a unique and visually stunning alternative to traditional carving. Begin by selecting a pumpkin and cleaning out the interior. Choose a variety of drill bit sizes depending on the desired hole size. Use the drill to create patterns, shapes, or even intricate designs by placing holes close together or spaced apart. As you drill, be mindful of the pumpkin’s thickness to avoid piercing through the entire wall. When the drilling is complete, place a light source, such as a string of LED lights or a small candle, inside the pumpkin. The light will shine through the drilled holes, creating a beautiful and atmospheric display. This technique is not only visually striking but also allows for a high degree of creativity and customization.
Stacked Pumpkins:
Stacked pumpkins offer a creative and eye-catching way to display multiple carved designs. Begin by selecting several smaller pumpkins of varying sizes. Carve each pumpkin individually with your chosen designs, whether they be faces, patterns, or scenes. Once the individual pumpkins are carved and illuminated, stack them on top of each other, securing them in place with wooden skewers or long toothpicks. Ensure that the largest pumpkin forms the base, with the smaller ones stacked on top in a visually appealing arrangement. This technique allows for a dynamic and customizable presentation, making it ideal for those who want to create a pumpkin display with a wow factor. Experiment with different designs and sizes to achieve a striking and unique stacked pumpkin arrangement.
Painted Pumpkins:
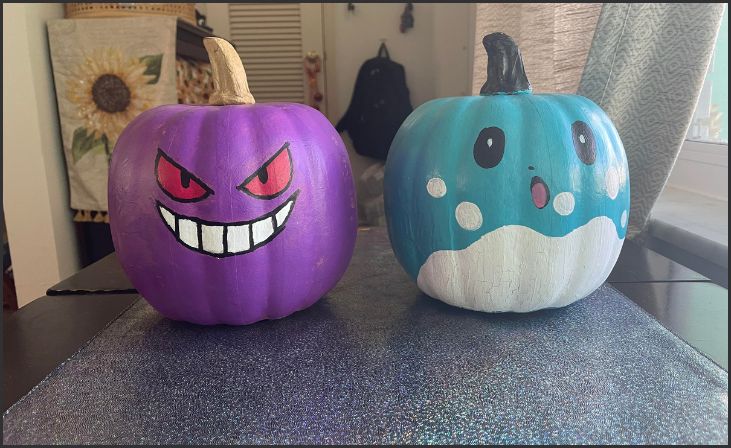
Painting pumpkins is a versatile and beginner-friendly alternative to traditional carving. Begin by selecting a pumpkin with a smooth surface, and clean it thoroughly. Acrylic paints work well for this technique, providing vibrant colors and good coverage. Choose a color scheme and paint the entire pumpkin or create patterns and designs. Use different brushes for various effects, such as fine details or broad strokes. Consider adding layers for depth and texture. This technique allows for endless creativity and is an excellent option for those who prefer not to handle sharp carving tools. Painted pumpkins also offer the advantage of a longer-lasting display compared to carved ones. Experiment with different painting techniques, from simple designs to intricate masterpieces, to achieve a personalized and visually stunning pumpkin.
Etched Pumpkins:
Etching is a technique that involves removing only the surface layer of the pumpkin to create designs. To etch a pumpkin, start by selecting a medium-sized pumpkin with a smooth surface. Clean the pumpkin’s exterior and draw your desired design directly onto the surface using a pencil or marker. Use a linoleum cutter or similar tool to carefully remove the top layer of pumpkin skin along the drawn lines. The goal is to create a design that allows light to shine through the etched areas when the pumpkin is illuminated. Etching provides a different texture compared to traditional carving, resulting in a sophisticated and detailed finish. This technique is ideal for those who enjoy precision and want to experiment with a unique pumpkin carving method.
Peek-a-Boo Windows:
Create an element of mystery and intrigue with peek-a-boo windows on your pumpkin. Start by selecting a medium-sized pumpkin with a smooth surface. Decide on the number and placement of the windows—these can be small or large, clustered or spaced apart. Carefully carve out the windows using a sharp knife, ensuring that the edges are clean and smooth. The goal is to create openings that allow glimpses of the illuminated interior without revealing the entire design. This technique adds an extra layer of creativity to your pumpkin carving, allowing you to play with light and shadow. When illuminated, the peek-a-boo windows create a captivating display that engages viewers and invites them to explore the hidden depths of your pumpkin. Experiment with different window shapes and arrangements to achieve the desired effect.
Nature-Inspired Carving:
Draw inspiration from nature by incorporating leaves, vines, or tree branches into your pumpkin carving. Begin by selecting a pumpkin with a surface suitable for your chosen design. Sketch the natural elements directly onto the pumpkin using a pencil or marker. Use a carving knife or linoleum cutter to carefully carve around the drawn lines, creating intricate patterns that mimic the beauty of nature. This technique allows for a blend of creativity and organic aesthetics, making it a great choice for those who appreciate the simplicity and elegance of natural forms. Experiment with different nature-inspired designs, combining leaves, vines, and branches to create a visually appealing and harmonious composition. When illuminated, these carvings cast shadows that enhance the overall effect, bringing a touch of the outdoors to your pumpkin display.
Also Read:- ORGANIC PUMPKIN FARMING PRACTICES
Emoji Pumpkins:

Bring a modern and playful twist to your pumpkin carving with emojis. Choose your favorite emojis or create your own designs inspired by these digital symbols. Start by selecting a medium-sized pumpkin and cleaning its exterior. Draw the chosen emojis directly onto the pumpkin using a pencil or marker. Use a carving knife to carefully cut along the drawn lines, creating openings for the light to shine through. Emojis offer a wide range of expressions, from smiling faces to ghosts, allowing you to convey different moods and themes. This technique is especially fun for Halloween or other festive occasions, adding a lighthearted and contemporary element to your pumpkin display. Experiment with different emojis and arrangements to create a set of expressive and entertaining pumpkin carvings that are sure to delight viewers of all ages.
Conclusion
Embark on an exciting and fulfilling pumpkin carving adventure, fully equipped with the invaluable knowledge of the 10 Best Pumpkin Carving Techniques crafted specifically for beginners. As you delve into this artistic journey, unleash the boundless reservoir of your creativity onto the canvas of pumpkins, transforming them into mesmerizing masterpieces.
Feel the exhilaration of bringing your ideas to life as you carve, shape, and mold each pumpkin with the newfound skills gleaned from our guide. This is not just about carving pumpkins; it’s about expressing your unique vision and allowing the spirit of Halloween to come alive in the most captivating and personal way.
Frequently Asked Questions
To extend your pumpkin’s lifespan, apply petroleum jelly to the cut edges and store it in the refrigerator when not on display.
Absolutely! Rinse the seeds, toss them with olive oil and spices, then bake until golden brown for a delicious treat.
Leave a Reply